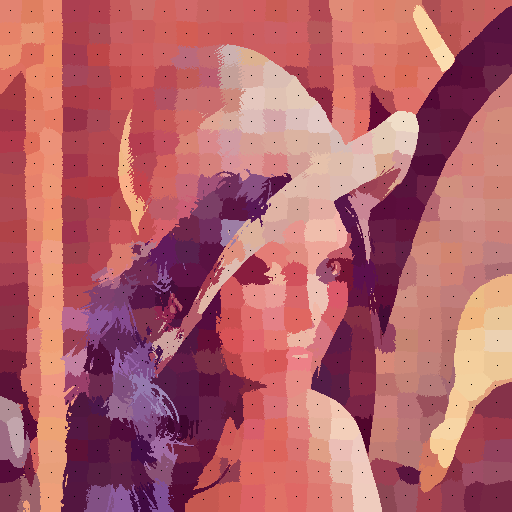
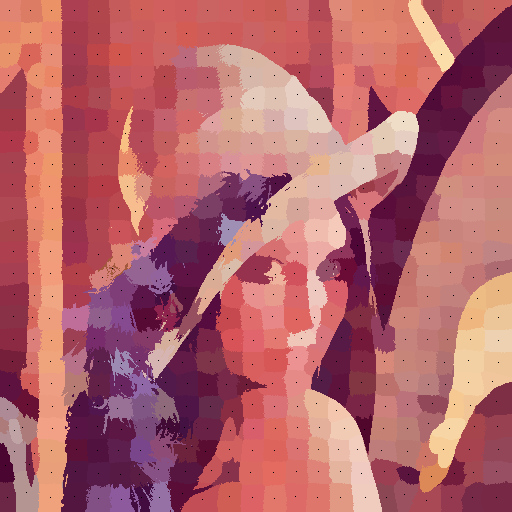
超像素(SuperPixel),就是把原本多个像素点,组合成一个大的像素。比如,原本的图片有二十多万个像素,用超像素处理之后,就只有几千个像素了。后面做直方图等处理就会方便许多。经常作为图像处理的预处理步骤。
在超像素算法方面,SLIC Superpixels Compared to State-of-the-art Superpixel Methods这篇论文非常经典。论文中从算法效率,内存使用以及直观性比较了现有的几种超像素处理方法,并提出了一种更加实用,速度更快的算法——SLIC(simple linear iterative clustering),名字叫做简单的线性迭代聚类。其实是从k-means算法演化的,算法复杂度是O(n),只与图像的像素点数有关。
这个算法突破性的地方有二:
- 限制聚类时搜索的区域(2Sx2S),这样将k-means算法的复杂度降为常数。整个算法的复杂度为线性。
- 计算距离时考虑LAB颜色和XY距离,5维。这样就把颜色和距离都考虑进去了。通过M可以调整颜色和距离的比重,灵活性强,超像素更加规则。
SLIC算法原理
整个算法的输入只有一个,即超像素的个数K。
图片原有N个像素,要分割成K个像素,那么每个像素的大小是N/K。超像素之间的距离(即规则情况下超像素的边长)就是S=√N/K。
我们的目标是使代价函数(cost function)最小。具体到本算法中,就是每个像素到所属的中心点的距离之和最小。
首先,将K个超像素种子(也叫做聚类,即超像素的中心),均匀撒到图像的像素点上。
一次迭代的第一步,对每个超像素的中心,2S范围内的所有像素点,判断他们是否属于这个超像素。这样之后,就缩短了像素点到超像素中心的距离。
一次迭代的第二步,对每个超像素,将它的超像素中心移动到这个超像素的中点上。这样也缩短了像素点到超像素中心的距离。
一般来说,迭代10是聚类效果和计算成本折中的次数。
SLIC算法步骤
- 撒种子。将K个超像素中心分布到图像的像素点上。
- 微调种子的位置。以K为中心的3×3范围内,移动超像素中心到这9个点中梯度最小的点上。这样是为了避免超像素点落到噪点或者边界上。
- 初始化数据。取一个数组label保存每一个像素点属于哪个超像素。dis数组保存像素点到它属于的那个超像素中心的距离。
- 对每一个超像素中心x,它2S范围内的点:如果点到超像素中心x的距离(5维)小于这个点到它原来属于的超像素中心的距离,那么说明这个点属于超像素x。更新dis,更新label。
- 对每一个超像素中心,重新计算它的位置。
- 重复4 5 两步。
伪代码(来自论文)
|
1 2 3 4 5 6 7 8 9 10 11 12 13 14 15 16 17 18 19 20 |
/∗ Initialization ∗/ Initialize cluster centers Ck = [lk , ak , bk , xk , yk ]T by sampling pixels at regular grid steps S. Move cluster centers to the lowest gradient position in a 3 × 3 neighborhood. Set label l(i) = −1 for each pixel i. Set distance d(i) = ∞ for each pixel i. repeat /∗ Assignment ∗/ for each cluster center Ck do for each pixel i in a 2S × 2S region around Ck do Compute the distance D between Ck and i. if D < d(i) then set d(i) = D set l(i) = k end if end for end for /∗ Update ∗/ Compute new cluster centers. Compute residual error E. until E ≤ threshold |
Python实现SLIC
最新版本的代码请看这里:https://github.com/laixintao/slic-python-implementation
|
1 2 3 4 5 6 7 8 9 10 11 12 13 14 15 16 17 18 19 20 21 22 23 24 25 26 27 28 29 30 31 32 33 34 35 36 37 38 39 40 41 42 43 44 45 46 47 48 49 50 51 52 53 54 55 56 57 58 59 60 61 62 63 64 65 66 67 68 69 70 71 72 73 74 75 76 77 78 79 80 81 82 83 84 85 86 87 88 89 90 91 92 93 94 95 96 97 98 99 100 101 102 103 104 105 106 107 108 109 110 111 112 113 114 115 116 117 118 119 120 121 122 123 124 125 126 127 128 129 130 131 132 133 134 135 136 137 138 139 140 141 142 143 144 145 146 147 148 149 150 151 152 153 154 155 156 157 158 159 160 161 162 |
import math from skimage import io, color import numpy as np from tqdm import trange class Cluster(object): cluster_index = 1 def __init__(self, h, w, l=0, a=0, b=0): self.update(h, w, l, a, b) self.pixels = [] self.no = self.cluster_index self.cluster_index += 1 def update(self, h, w, l, a, b): self.h = h self.w = w self.l = l self.a = a self.b = b def __str__(self): return "{},{}:{} {} {} ".format(self.h, self.w, self.l, self.a, self.b) def __repr__(self): return self.__str__() class SLICProcessor(object): @staticmethod def open_image(path): """ Return: 3D array, row col [LAB] """ rgb = io.imread(path) lab_arr = color.rgb2lab(rgb) return lab_arr @staticmethod def save_lab_image(path, lab_arr): """ Convert the array to RBG, then save the image """ rgb_arr = color.lab2rgb(lab_arr) io.imsave(path, rgb_arr) def make_cluster(self, h, w): return Cluster(h, w, self.data[h][w][0], self.data[h][w][1], self.data[h][w][2]) def __init__(self, filename, K, M): self.K = K self.M = M self.data = self.open_image(filename) self.image_height = self.data.shape[0] self.image_width = self.data.shape[1] self.N = self.image_height * self.image_width self.S = int(math.sqrt(self.N / self.K)) self.clusters = [] self.label = {} self.dis = np.full((self.image_height, self.image_width), np.inf) def init_clusters(self): h = self.S / 2 w = self.S / 2 while h < self.image_height: while w < self.image_width: self.clusters.append(self.make_cluster(h, w)) w += self.S w = self.S / 2 h += self.S def get_gradient(self, h, w): if w + 1 >= self.image_width: w = self.image_width - 2 if h + 1 >= self.image_height: h = self.image_height - 2 gradient = self.data[w + 1][h + 1][0] - self.data[w][h][0] + \ self.data[w + 1][h + 1][1] - self.data[w][h][1] + \ self.data[w + 1][h + 1][2] - self.data[w][h][2] return gradient def move_clusters(self): for cluster in self.clusters: cluster_gradient = self.get_gradient(cluster.h, cluster.w) for dh in range(-1, 2): for dw in range(-1, 2): _h = cluster.h + dh _w = cluster.w + dw new_gradient = self.get_gradient(_h, _w) if new_gradient < cluster_gradient: cluster.update(_h, _w, self.data[_h][_w][0], self.data[_h][_w][1], self.data[_h][_w][2]) cluster_gradient = new_gradient def assignment(self): for cluster in self.clusters: for h in range(cluster.h - 2 * self.S, cluster.h + 2 * self.S): if h < 0 or h >= self.image_height: continue for w in range(cluster.w - 2 * self.S, cluster.w + 2 * self.S): if w < 0 or w >= self.image_width: continue L, A, B = self.data[h][w] Dc = math.sqrt( math.pow(L - cluster.l, 2) + math.pow(A - cluster.a, 2) + math.pow(B - cluster.b, 2)) Ds = math.sqrt( math.pow(h - cluster.h, 2) + math.pow(w - cluster.w, 2)) D = math.sqrt(math.pow(Dc / self.M, 2) + math.pow(Ds / self.S, 2)) if D < self.dis[h][w]: if (h, w) not in self.label: self.label[(h, w)] = cluster cluster.pixels.append((h, w)) else: self.label[(h, w)].pixels.remove((h, w)) self.label[(h, w)] = cluster cluster.pixels.append((h, w)) self.dis[h][w] = D def update_cluster(self): for cluster in self.clusters: sum_h = sum_w = number = 0 for p in cluster.pixels: sum_h += p[0] sum_w += p[1] number += 1 _h = sum_h / number _w = sum_w / number cluster.update(_h, _w, self.data[_h][_w][0], self.data[_h][_w][1], self.data[_h][_w][2]) def save_current_image(self, name): image_arr = np.copy(self.data) for cluster in self.clusters: for p in cluster.pixels: image_arr[p[0]][p[1]][0] = cluster.l image_arr[p[0]][p[1]][1] = cluster.a image_arr[p[0]][p[1]][2] = cluster.b image_arr[cluster.h][cluster.w][0] = 0 image_arr[cluster.h][cluster.w][1] = 0 image_arr[cluster.h][cluster.w][2] = 0 self.save_lab_image(name, image_arr) def iterate_10times(self): self.init_clusters() self.move_clusters() for i in trange(10): self.assignment() self.update_cluster() name = 'lenna_M{m}_K{k}_loop{loop}.png'.format(loop=i, m=self.M, k=self.K) self.save_current_image(name) if __name__ == '__main__': p = SLICProcessor('Lenna.png', 500, 30) p.iterate_10times() |
效果如下:


你好, 非常感谢你的代码,我发现了几个小问题:
1. self.cluster_index += 1 因为对于每个对象cluster_index 都等于 1, 所以这样的话每个self.cluster_index都会等于2, 起不到index的作用, 建议改成Cluster.cluster_index += 1
2. gradient = self.data[w + 1][h + 1][0] – self.data[w][h][0] + \ 的w和h和别处是反的
谢谢指出!第一个我觉得你说的对,源代码也是写到了class的属性里面,应该是我写错了但是代码能work就没注意到。第2个我不太确定,得明天调试一下。写着写着调来调去的我也不知道自己写的什么了……
这个代码其实写的比较乱,这篇论文读着好玩的,就试了一下。代码可能存在别的漏洞,要小心使用哦~
你好:) 我又发现了一个问题, 在update_cluster函数里面, 你是取了h和w的平均值, 然后取图中对应位置的l,a,b; 这样得到的结果和slic官网上c++代码得到的结果不太一样, 我看了一下发现他们对l,a,b也取了平均
l,a,b平均值这个做法应该是论文里面的,我上面的代码只参考了论文,别处的实现可能带有优化。不过不好意思,我现在回去看这个代码也看不懂了…… 要解释的话只有从头复习一遍论文…… 帮不上你了。你可以调试对比一下。
我明白了,如果把SLIC看成是clustering, 那论文里面就是在[x, y, l, a, b] 5维空间的clustering,5维向量取平均得到的新的中心不一定是图上的点; 你当时可能考虑新的中心应该是图上实际存在的点
隐约记得是这样的,我记得我没有做按照自己想法的处理,都是照着论文上来的。你看论文上有没有推荐这样处理不在图像上的点?这个算法好像供自己调节的只有两个参数,写出来的结果应该不会差太多。
请问一下,我换一个图片就报错了:IndexError: index 3026 is out of bounds for axis 0 with size 3024 这是什么情况?
图片的宽高是用库从文件里面读出来的:
你的文件格式是png吗? 你手动调试一下,设置一下宽高试一下。
我运行你的代码,会显示错误,only integers, slices (`:`), ellipsis (`…`), numpy.newaxis (`None`) and integer or boolean arrays are valid indices,请问是为什么呢
从错误信息看只能知道是个下标错误,你是否修改过?可能某个地方写错了下标?或者样本图片不对。你可以到 github 去 clone 原来的代码仓库运行那个试试,看有没有问题。
具体的错误信息可以 Google 一下,看一下具体的行 debug。
我的也是这样呢,请问你怎么解决的呢
你运行github上面的代码正常吗?
你好,github上的代码报错nly integers, slices (`:`), ellipsis (`…`), numpy.newaxis (`None`) and integer or boolean arrays are valid indices,请问是什么原因
能提供下 numpy python 的版本以及具体的 traceback 吗?
谢谢!不过已经改好了,是有些w、 h 没有转换为Int类型,所有的加一个强制转换就好了。
赞!
求改好的源码,能分享下不?
Github上那个就是可以跑的啊
我的邮箱:[email protected]
能告知一下你是在哪个地方如何转换的吗?
可以分享一下修改好的代码吗?
请问这个强制转换怎么加
我的邮箱:[email protected]
楼主,您好,谢谢您的代码,希望您能提供一下图片显示的代码,我自己添加的只出现一种颜色,谢谢
不知道图片显示的代码指的是啥,save_current_image 这个函数就可以吧? 你可以先跑github上的代码,然后自己改。你这么说我也听不明白你哪里出问题了。
好的,谢谢,是我之前想错了,GitHub上的代码可以跑通,谢谢楼主
JPG格式不行吗?
不改是不行的,你要改下打开图片那部分的代码。
您好,请问出现这个错误是什么原因呢?应该如何解决?
我没遇到,估计是跟上面的同学一样,参考下:https://www.kawabangga.com/posts/1923#comment-17752
好的,谢谢
博主你好~
我在用opencv-python进行读写图片的时候遇到输出效果很差的问题,修改的代码如下:
你感觉可能是哪里出现了问题呢? 谢谢
应该是 bgr = cv2.resize(bgr, (480, 480)) 这一行对图片进行缩放了吧。
感谢博主~
可是我用skimage也缩放了,效果很好
有没有可能是在转换到LAB通道和转换回RGB的时候,有不同?
我认为这个转换应该是无损的,你可以把 resize 那一行去掉试试
reply: resize没有影响。以下是我另一个测试,在RGB->LAB的过程中,cv2的lab结果在0-255之间,但是skimage的结果却有诸如1.00000000e+02、-2.45493786e-03 的数字。您认为这样会对分割结果造成怎么的影响?
“`
import cv2
from skimage import io, transform, color
import numpy as np
if __name__ == ‘__main__’:
filename = ‘data/train/RGB-PanSharpen_AOI_2_Vegas_img1.tif’
img_c = cv2.imread(filename)
img_s = io.imread(filename)
# img_c, img_s: same values
lab_c = cv2.cvtColor(img_c, cv2.COLOR_BGR2LAB)
lab_s = color.rgb2lab(img_s)
print(lab_c, ‘\n—-\n’, lab_s)
“`
具体两个库的实现我也不是很清楚,不过按照我的理解 LAB 和 RGB 的转换应该只是色彩的表示方式的转换吧,像素点应该还是那么多像素点,效果应该是看起来颜色不一样了,但是图像的分辨率应该是完全一样的。
将K个超像素中心分布到图像的像素点上。
请问如何分割成带边界的图像,谢谢。
同求
同问有没有增加像素块边界的修改方法?
你好我想问一下 ,这个代码处理 1000 x 1000的图像迭代几次,大概得多久呢? 在不进行缩放的情况。
博主,你好,我跑你GitHub的代码跑了十几二十分钟正常吗?
就是全部图片都跑出来了。为什么会这么久,SLIC不是快速
的吗?我网上下别人的matlab代码跑也很慢,有时候一张图
也得跑一两分钟,但是看作者那张对比性能图2048*1536只
要16秒多,这是为什么?
算法的参数一样吗?跟电脑的配置也有关系
您好 请问为啥换一张自己的图片就不行了呢 图片格式是png格式的
报错:RuntimeError: Exception thrown in SimpleITK ReadImage: D:\a\1\sitk\Code\IO\src\sitkImageReaderBase.cxx:107:
sitk::ERROR: Unable to determine ImageIO reader for “D:\Desktop\slic-python-implementation-master\slic-python-implementation-master\test.png”
https://stackoverflow.com/questions/35095888/how-can-i-load-an-image-with-its-alpha-channel-with-skimage
想问一下参数M代表什么
我也想知道
踩踩